Sewing With Mer-Mer

…AND THAT'S HOW YOU SEW

Put A Ring On It October 18, 2011

Filed under: Snapshots of the Past — gforce13 @ 4:04 am

Mer-Mer has made pillows with hearts on them, trees, elephants and puppies, swords and a triforce, a treasure map; pillows that glow in the dark; pillows made from t-shirts, dress shirts and denim; pillows to stir an emotion or one’s imagination; pillows to cuddle with, nap with, and soothe an aching heart. Now she’s made a pillow to carry rings down the aisle.


When Mer-Mer started finding out about the wedding plans of her soon-to-be-married friend Susannah, she asked what you might expect from a sewer with such a pillow-making history: “Susannah, can I make your ring pillow?!” To which Susannah replied simply, “Okay.”


From there the two went to JoAnn’s to pick out an assortment of fabric for the patchwork top of the pillow. Mer-Mer also pulled from fabrics she had collected over the summer.


Sewing the patchwork of fabrics together was fairly easy, although Mer-Mer had to add backing to some of the sheer fabrics to prevent the back of the pillow from showing through them. To keep all the different fabrics firmly pressed, Mer-Mer borrowed irons from freshmen in her old dorm.


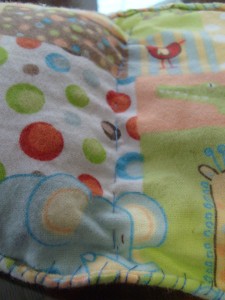
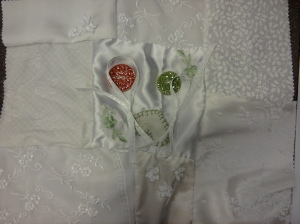
Looking at the picture above, you probably notice two ceramic buttons that stand out against the rich white patchwork. They will hold the place of the bride and groom’s rings. Susannah picked the green button because green is her favorite color. Mer-Mer made another trip to JoAnn’s to find the matching red button, honoring the groom’s — Shengming’s — favorite color.


Two ribbons, which will be used to fasten the rings,  fill the space directly above the buttons. Before Mer-Mer sewed the ribbons to the pillow, she painted the cut ends with nail polish to prevent them from fraying.


To further garnish the pillow, Susannah gave Mer-Mer some special fabric, which Mer-Mer turned into a heart, and two prettified flowers. Mer-Mer also added some additional flowers from JoAnn’s, the tiny white ones. She attached these with very small stitches.


Put it all together, and you get a pillow that’s sure to light up the isle.


Susannah sent pictures of the completed pillow to Shengming. Here’s a transcript of the conversation that followed:


Shengming:  “That’s a very pretty pillow. What’s it for?”


Susannah:  “Well, at an American wedding, you need a way to get the rings down the aisle, so they put them on a pillow which is usually carried by a little boy.”


Shengming:  “Since Mer-Mer made the pillow, she should carry it down!”


Susannah:  “Umm…little boy?”


Shengming:  “Oh, we can make an exception.”
 

The Best Oatmeal You’ll Never Eat March 26, 2011

Filed under: Snapshots of the Past — gforce13 @ 9:44 pm

Oatmeal cookies, oatmeal bars, oatmeal squares, oatmeal muffins, instant oatmeal and heating pads.


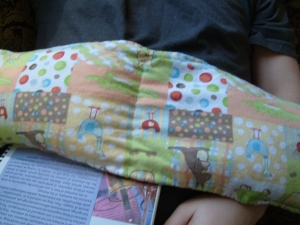
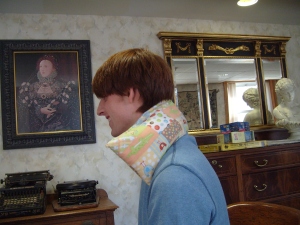
The best use for oatmeal might in fact be relieving the body’s aches and pains. The two-pocket bag pictured above, which is packed with spice-infused oatmeal, does just that. Stick it in the microwave for two minutes and you have a warm, relaxing, delicious-smelling heating pad to rest on your stomach or around your neck.


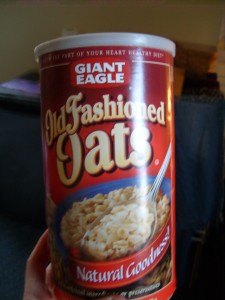
These heating pads also make convenient Christmas gifts. Mer-Mer made four last Christmas and went through four tw0-pound tubs of oatmeal in the process.


This stuff tasted boring, until Mer-Mer added some spice to it.


For each heating pad she made, Mer-Mer used an entire box of oatmeal, half for each of the heating pad’s two pockets. Before adding the oatmeal to the heating pads, she let it marinate in a mix of nutmeg, cinnamon, allspice and cloves, using one teaspoon of each except for cinnamon, which was represented twice as much with two teaspoons.


To make the heating pad itself, Mer-Mer cut one rectangle, folded it in half putting the wrong sides together, pinned the sides together and sewed. Before sewing it shut, she filled the heating pad halfway with the scented oatmeal and then sewed a partition in the middle of the bag.


Stiches in the middle of the heating pad


Then she filled the other half with oatmeal and sewed the end shut.


A completed heating bag. This one went to Mer-Mer's friend Krista.


Sarah's heating pad, featuring kangaroos and strange blue birds.


George modeling the heating pad on his stomach. He had a stomach ache from reading too much Microbiology.


Mer-Mer tried to nom my neck.


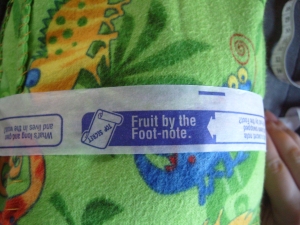
In case you were wondering how Mer-Mer makes measurements for her sewing projects, here’s your answer:


…with Fruit by the Foot.


A Pirate’s Dream March 16, 2011

Filed under: Snapshots of the Past — gforce13 @ 3:26 am

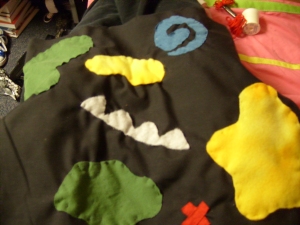
A recent poll revealed that a majority of one-leg, two-teeth pirates would rather have a treasure map they can cuddle with than one that requires a paper weight.


With this knowledge, Mer-Mer decided to make a treasure map pillow for her brother.


Just kidding. The real motivation was left-over fabric from the triforce pillow she made me (seen here) and Mer-Mer’s creed to be an equal-opportunity sewer — if she was going to make a Valentine’s Day present for one brother, she had to make one for the other too.


In addition to the fabric from the triforce pillow, for this project Mer-Mer unearthed unused red fabric and scraps of old t-shirts donated by her roommate.


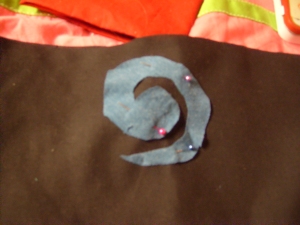
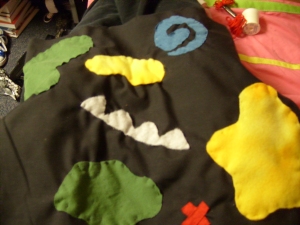
Pirates need danger on their journey, so Mer-Mer created this whirlpool. She made it by first cutting a big circle and then cutting in a circular motion inside that circle to create a spiral. To make it so you could actually see the spiral, she widened the gap between the lines.


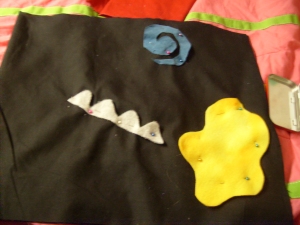
Maps need islands. Really bright ones. Mer-Mer made two yellow islands like the one pictured above and two green islands.


Aside from escaping whirlpools, pirates need other challenges, such as navigating bumpy rocks (seen next to the yellow island).


X marks the spot. Mer-Mer made the end-point of the pirate’s journey by sewing two rectangles on top of each other.


To highlight a route to the treasure, Mer-Mer used embroidery floss to make a dotted path. With all the pieces attached to the backdrop, Mer-Mer stuffed the pillow and sewed it shut.


Before sending the finished product to her brother, Mer-Mer showed the pillow to her friend Krista. While she liked the pillow, Krista asked, “Why is the water black?” Mer-Mer responded, “It’s NIGHTIME!”


Snapshots of the Past: Stuff for Stuffed Animals February 26, 2011

Filed under: Snapshots of the Past — gforce13 @ 5:06 am

Some stuffed animals get cold in the wintertime. Others like to sleep in pajamas. And there’s that bunch who enjoy playing dress-up.


Mer-Mer is a stuffed animal advocate, which is why she decided to help these animals meet their needs and have some fun. And, as with many of Mer-Mer’s other projects, she had left-over fabric she wanted to use.


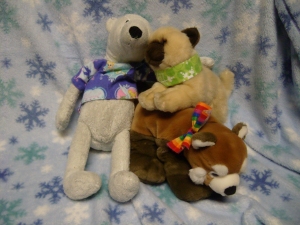
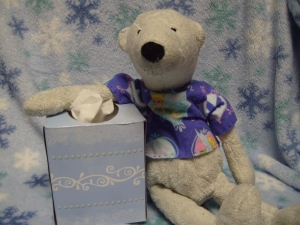
Meet PB, which stands for either Peanut Butter or Polar Bear. She belongs to Molly, Mer-Mer’s roommate.

Mer-Mer had extra fabric from a shirt pillow that she made for Molly. Because PB spends a lot of time on Molly’s bed next to this pillow, Mer-Mer thought it would be neat if PB had something to wear that matched the pillow.


Hence PB’s adorable, form-fitting Tinker Bell t-shirt. To make the garment, Mer-Mer first laid PB on a piece of paper and traced her. Then she drew a shirt around PB’s outline, cutting two pieces of fabric to match the shirt design. Mer-Mer sewed the pieces together, turned the sewed piece inside out, and cut a hole for PB’s neck to complete the shirt.


For a more detailed account of how Mer-Mer made PB’s shirt check out this video:


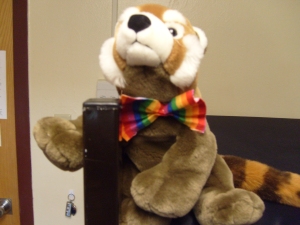
Next meet the Red Panda, who belongs to Teresa, one of Mer-Mer’s friends. Teresa got the Panda when her dad made a donation to the National Zoo to adopt a real Red Panda. A passionate voice for the safety of endangered species, the Red Panda spends most of its days discussing wildlife with the other stuffed animals that inhabit Teresa’s bed.


The inspiration for the Red Panda’s bow tie comes from a sock puppet that Mer-Mer made her cousin. Mer-Mer outfitted the puppet with a bow tie made out of rainbow-colored fabric, and, having known the Red Panda for some time, thought a bow tie of the same fabric would compliment Teresa’s treasured stuffed animal.


Making the bow tie was simple. She cut out a small, rectangular piece of fabric, scrunched it in the middle like a fan and sewed it in place. To make the bow tie wearable, she attached a ribbon to it.


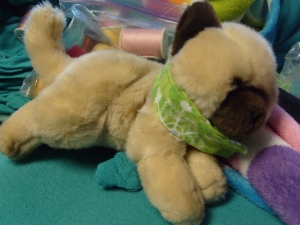
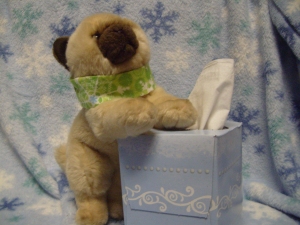
Finally, meet Sagwa, the Chinese-Siamese cat. She is the daughter of Mer-Mer and her  friend Susannah. (I would  explain, but there’s WAY too  much drama involved.)


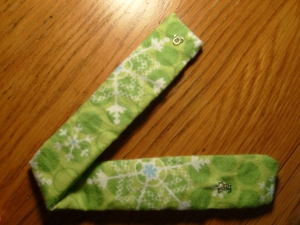
Having made PB and the Red Panda clothing, Mer-Mer thought it would only be right to make something for Sagwa. She decided on a collar made of the fabric I used to make her a Christmas present. (Not familiar with the way JoAnn’s works, I bought about two extra yards of fabric.)


To make the collar, Mer-Mer wrapped fabric around Sagwa’s neck and then cut it. Next she folded the cut fabric and half and sewed it together. Because Sagwa’s a very mobile cat (Mer-Mer and Susannah share custody), Mer-Mer sewed a hook and eye to the collar to make sure it wouldn’t fall off.


We love these animals so much that we had to do a photo shoot with them. Below are the results…


Snapshots from the Past: Sweatpants in Action February 21, 2011

Filed under: Snapshots of the Past — gforce13 @ 3:32 am

Black and Gold. Warm and comfy. They used to be Mer-Mer’s favorite pair of sweatpants, until several small holes grew into larger holes, making the sweatpants unwearable. (If you’d like to know where the holes were, just ask Mer-Mer.)


Where some might have seen catastrophe, Mer-Mer saw opportunity. She decided to use the abundance of fabric from her sweatpants for two sewing projects: a draft-stopper and bag for grocery bags.


Making the draft stopper was like making a pillow. Mer-Mer cut off one leg of the sweatpants starting at the crotch point up to just under the waist (Here’s a diagram of all the parts of a pair of pants.) Then she turned the pant-leg inside-out and sewed it shut, leaving an opening for stuffing. After turning it inside-in, she filled the leg with stuffing and made the final stitches.

You can also use the draft stopper as a body pillow.

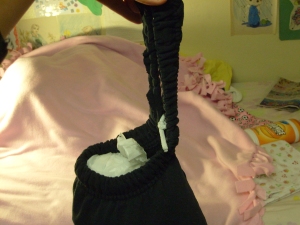
After a few months of trips to Walmart, JoAnn’s Fabric, Goodwill, Martin’s, Giant Eagle and the Dollar Tree, the plastic bags start to pile up. That’s why Mer-Mer decided to make a bag to hold them all using her sweatpants’ remaining leg and waist band.

Like the draft stopper, she turned the leg inside-out and sewed the open areas shut. She used fabric from the crotch area of the draft-stopper leg to cover the exposed elastic from the waist band of the missing leg.

The last step involved taking the plastic bags scattered about Mer-Mer and her roommate Molly’s floor and stuffing them in the bag holder.

Pulling a bag from the bag holder, now hanging from a hook on the door.

Formerly retired to Mer-Mer’s sewing box, it’s safe to say that these sweatpants are happy to be back in action.


Snapshots from the Past: Checkmate/Pollinate February 6, 2011

Filed under: Snapshots of the Past — gforce13 @ 11:28 pm

Have you ever gotten frustrated with chess pieces’ heads falling off? We did.

That’s why Mer-Mer made this chess set, comprised of 32 pillows and buttons and 64 colorful squares.

For this project you’ll need:

-Half a yard of two different colored fabrics. This will be used to make the pieces.

-32 buttons, 16 of one type (pawns), four of three other types (knights, rooks and bishops) and two of two other types (queen and king).

-Square-patterned fabric.This will be used for the board. You’ll need enough to have 9 or 10 squares on what will be the top side the board.

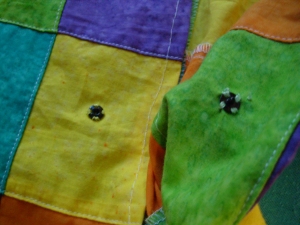
The extra squares will be used for seam allowance and snaps (note: The snaps allow the chess board to stay folded as a bag, making it portable. You throw the pieces in the bag, snap it shut and go).

-Stuffing for the pieces, but not too much. (Mer-Mer took hers from an old pillow that ripped in the wash in a really awkward spot).

For the board, put right sides together. Sew the sides together so that you end up with 8×8 squares on the top side. This will require folding over an extra square or two, which, as mentioned earlier, you’ll use for to make your seam and attach your snaps. When you finish sewing the board, turn it inside out.

The size of the square on the board fabric will determine your piece size, but remember to cut for seam allowance. Once you have fabric cut for the pieces, start making the pillows, using the buttons to identify each piece. Mer-Mer used crayons for pawns:

Zebras for knights:

Lighthouses for rooks:

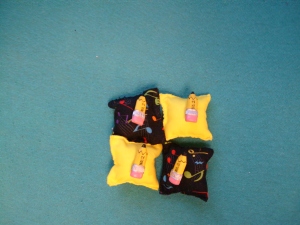
Pencils for bishops:

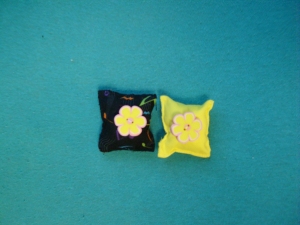
Flowers for queens:

And bees for kings:

Mer-Mer says that the most difficult part of part of the project was making the board and sewing on the snaps. She recommends that you place the snap on the correct square and check to make sure the snaps aren’t upside down.